Record View Edit Menu
Record View Edit Menu
Note: The commands in the menu may vary depending on the table and/or user permission.
File
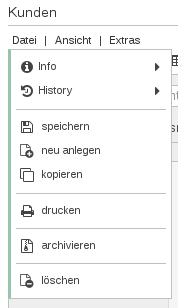
Info
Information about when and by whom the record was created or modified, as well as an overview of the key combinations (short cuts) available in this view.
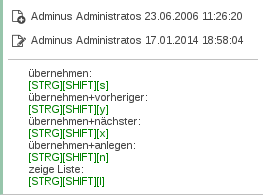
Fig.1: file / info
Explanation Shortcuts
| Save + Prev | = Save data and the previous data record will be displayed |
|---|---|
| Save + Next | = Save data and the next data record will be displayed |
| Save + Create | = Save data and create a new data record |
History
Displays when and by whom the data record or specific data fields have been modified, as well as the old and new value of the field. The changes are recorded only for certain tables and fields, defined by the Admin. Is there no history for a data record, the menu command is not displayed.
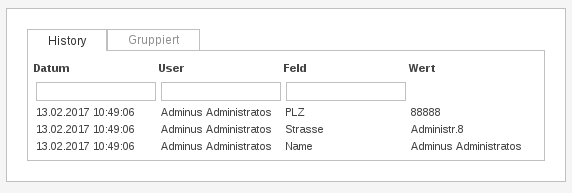
Fig.2: file / history
Save
Save modified data.
Create New
Creates a new data record. 2 variations are possible. The admin defines per table which variation is used.
Variation 1:
After selecting File -> Create New , a window appears with the question :’ Do you want to create a new record?’ When confirmed with OK, a Data record ID will be assigned and an empty data record is created. This data record can now be edited. It is not recommended to create empty data records.
Variation 2:
After selecting File -> Create New, a window appears with the question:’ Do you want to create a new record?’ When confirmed with OK, an input mask appears to enter the data. The data records will only be created after you choose SAVE.
Copy
The record is copied, but only the data fields defined by the administrator are taken into account.
The print function of your browser will be activated. The screen contents will be printed or saved to a file.
Versioning
Create a new version of a data record. Go to File -> Versioning. A confirmation window appears. Click OK if you want to version this record, or cancel it. You can also add a note(e.g. a reason for the new version) if you have versioned in the record view.
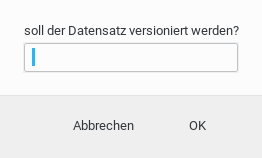
After the confirmation of the question the current version of the record "disappears". The new version appears at the end of the table. In the record view you can select in the top right corner which version of the record shall be shown. If you want to show the versioned records, select "show versioned" in the view menu.
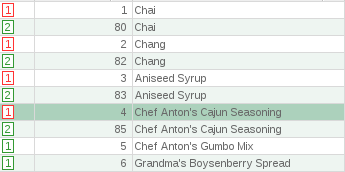
The table now shows all records, versioned or not. All versions of one item are shown after each other. There is now a new column in the table which shows the version number of the record. If you have a versioned record this record is red.
Note: Only the current version of a data record can be changed.
Deleting the current version deletes also all existing versions. (user authorization dependent) It is also possible that changes in certain data fields automatically create a new version The system can compare versions. Extra -> Compare With Versions can also be automatically compared. Have a look at menue-> extras -> compare with.
Note that versions can only be compared if you are in the record view.
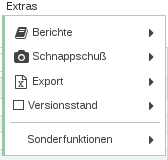
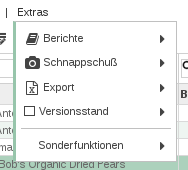
At Menu->Extras->show versions status there is the possibility to show the version at a specific date.
Archive
Selected data records will be archived. Archived data records are not displayed in the Record List. To edit (change, version or delete) an archived data record you first have to recover it.
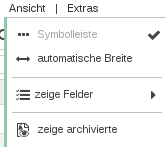
You now see a list of the archived records and can edit them in the detail view with a double click.
An archived entry is now marked in the detail view by a small icon at the top right.

Delete
Selected data records will be deleted. They are physically deleted and cannot be restored.
View
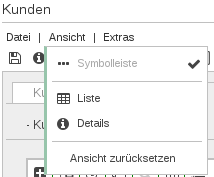
Toolbar
Hide or unhide toolbar.
Grouping Headers
To Switch between Default Form and Customized form.
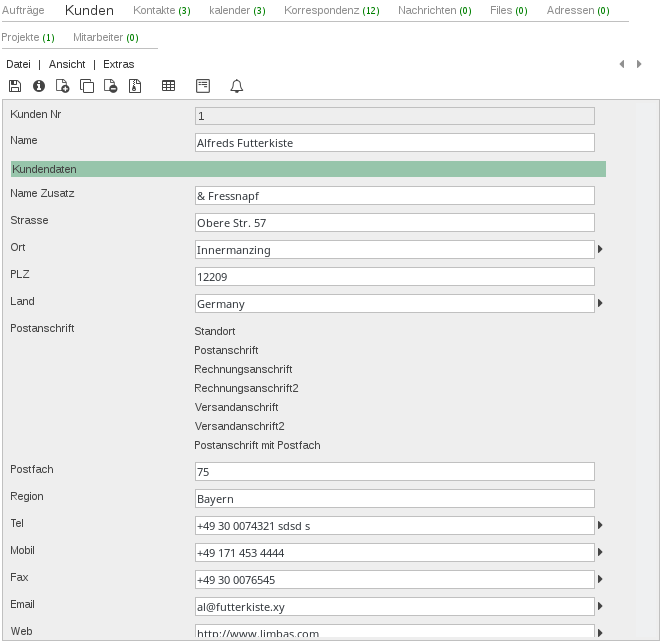
Fig.3: View / Default Form
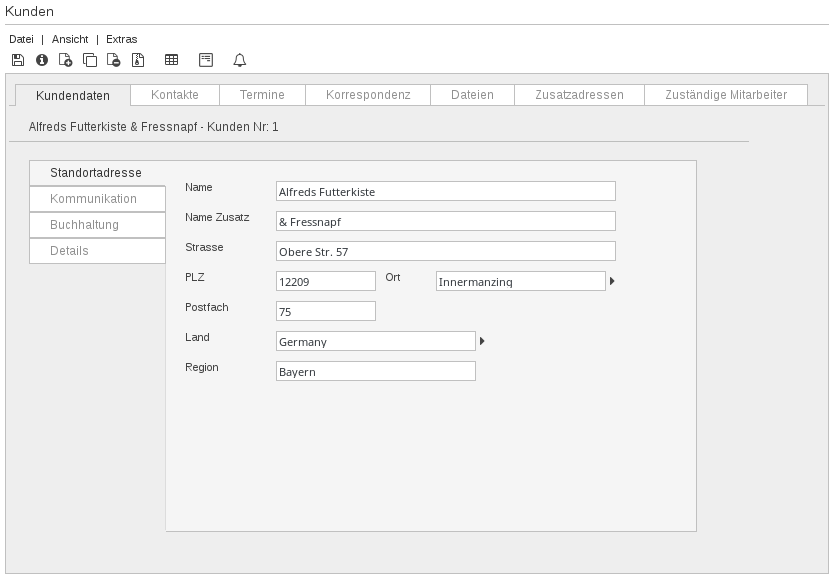
Fig.4: View / Grouped Branches - Register View
List
Switch from Record View to Record List.
Details
Switch from ‘Change Mode’ to ‘Display Mode’ – no data changes possible.
Edit
Switch from ‘Display mode’ to ‘Change mode’ – data can be edited.
Reset View Settings
Reset both, data selection and view settings (back to default).
Extras
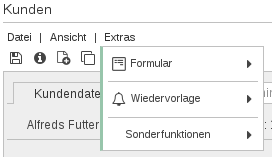
Form
Select Default Form or Customized Form.
Report
Select the report you want to create. An example for a report in the Record View would be a ‘product data sheet’.
Reminder
A Reminder is linked to a data record and will be shown in the Media Menu. Reminder
Choose a date or a period of time to define the due date of your Reminder, add a remark (optional) to know what the Reminder was for. You can set a Reminder for yourself, another user or a user group.
Either a period (for example 2 days) or an absolute date with time may be given. One or more users or user groups can be selected and an information text can be entered.
Existing Reminders are displayed and can be deleted with a click on the X symbol next to the Reminder.
Compare with
Compare the current version of a data record with another version. When you choose the Menu command ‘Compare With’, you can select also the version you want to compare the current data record with. The modifications are displayed field by field with old and new value.
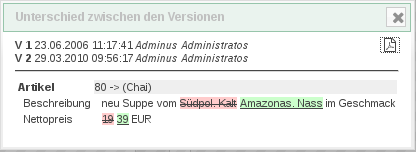
Fig.5: extras/compare to
Click on “show as pdf” to change the format and save the result as a .pdf file.
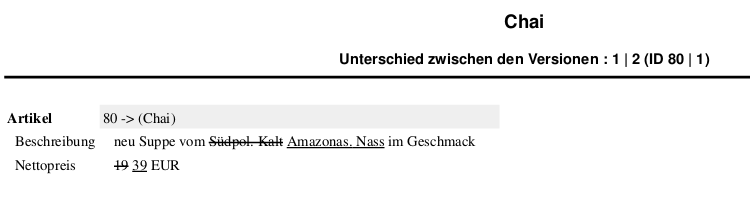
Fig.6: extras/compare to - show as pdf
User Rights
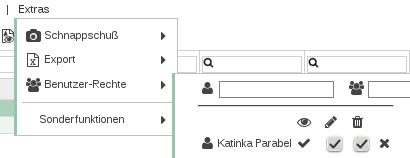
If the rights to a specific table or line have been assigned by the admin, you can assign different rights to selected users: (Extras → User rights):

read

edit

delete
Extra / Files
Upload files and pictures.
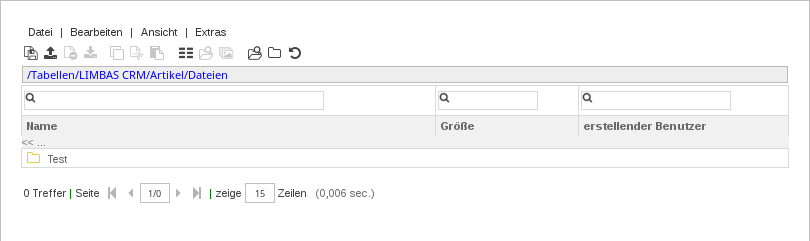
Fig.7: picture stock
Special cases : You can also upload files to a specific data record. Go to Menu Extras -> Files -> Pictures or use, if available the input fields in the form. You can upload up to 10 files at once. The following example shows how to upload 3 files. Choose the amount of files you want to upload.

Fig.8: 1 row for data selection
Change the number of files you want to add from 1 to 3 and you can select 3 files to upload.

Fig.9: 3 rows for selection of added data
Click on the BROWSE button, select the file you want to upload and click ‘Upload File’.
Zipped files can be unzipped when uploading.
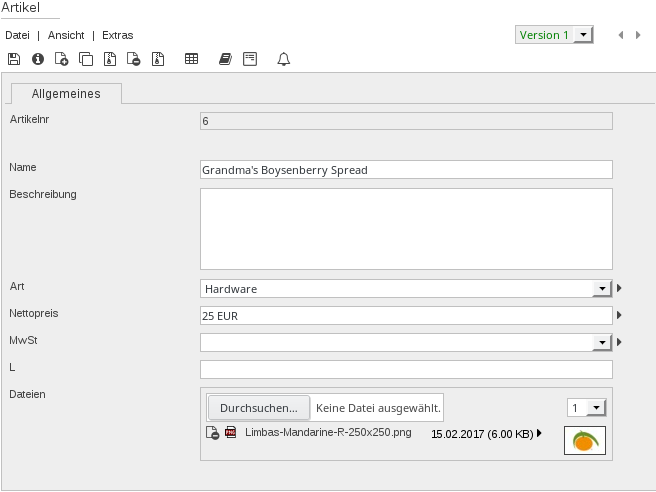
Fig.10: Files can be unpacked when uploading
Record View– Toolbar
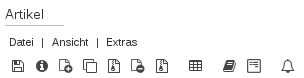
Fig.11: Record List Overview Toolbar
- Save Modification [STRG][SHIFT][s]
- Record Detail
- Create Record
- Copy Record
- Version Record
- Delete Record
- Archive Record
- Record List [STRG][SHIFT][l]
- Reports
- Form
- Mark as Reminder / Reset reminder
Record View - Icons for Links
The various symbols that are possible for links are described below. You can see this in the demo application, for example in the detail view of an order.
Create Link

A dew data record will be created and linked to the data record just edited.
Example: A customer can have several contact persons.
Customer: Stadtverwaltung Contact: Hr. Schmidt Contact: Hr. Mueller A new employee has joined the city council. His name is Hr. Huber. With ‘create new data record link’, the new contact created will also be linked to the customer “City Council”.
The data record City Council shows now 3 links with the related contacts Hr. Schmidt, Hr. Mueller and Hr. Huber.
Edit Linked Data Record

Change to edit mode and back. In edit mode you can edit the displayed fields of the linked data record.
Search data record

Search for a linked data record. Click on the icon and the search fields will be displayed above the head line. Click again and the search fields will disappear. Search is only performed within the linked data records. Search for substrings is possible. All search functionalities of the ‘Record List’ are available. For further details check Search.
Example: You are looking for a contact person of the city council, but you remember only the first name. Show search fields and enter the first name.
Open Link

Opens a window with the Record List of all linked data records. Links can be removed without deleting the linked data record. You can also create new, linked data records.
Select Displayed Fields

Select the fields that should be displayed.
Example: Contacts are linked. Fields like Surname, First name, Customer, Department, Phone can be selected to be displayed.
Delete Link

Removes the link and the linked data record!
Change the order of the displayed links

A link can be displayed one place up or down click on the relevant arrow (up or down).
Record View context-dependent (type-field-dependent) Toolbars
The order the links are displayed in can be changed by clicking on the header. Click on ‘first name’, the links will be sorted (ascending) by first name. Click again on ‘first name’ and it will be sorted in descending order by ‘first name’. To get back to sort by ‘last name’ simply click on the header ‘last name’.
Toolbar - Linked Tables
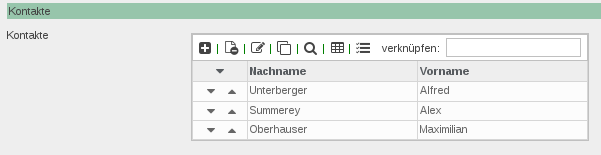
Fig.12: Toolbar Contacts Sort
- Create Link
- Edit Link
- Search Link. Search fields above the header are only displayed if ‘Fast Search’ is activated for these fields.
- Open Link
- Select Displayed Fields
- Remove the link and delete the linked data record
- A link can be displayed one place up or down click on the relevant arrow (up or down)

‘Remove Link’ (alternative to 6, depending on the type of link; see right) Removes the link, but the ‚unlinked‘ data record will not be deleted. Note: The displayed width of the data fields corresponds to the settings of the Record List. Personal settings in the Record List are also relevant for the Listed Links.
Toolbar – Linked Dates
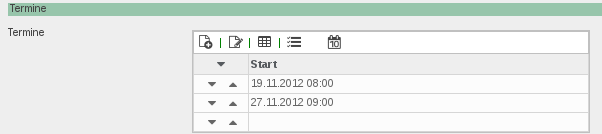
- Create Link
- Edit Link
- Open Link
- Select Displayed Fields
- Show Link in Calendar
Toolbar – Linked Mails
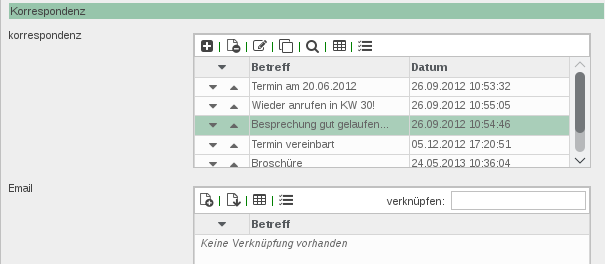
| 1. Create Link | |
|---|---|
| 2. Link data record | |
| 3. Open Link | |
| 4. Select Displayed Fields | |
| Correspondence | 5. Create Link |
| 6. Edit Link | |
| 7. Search data record |
Toolbar – Linked Files
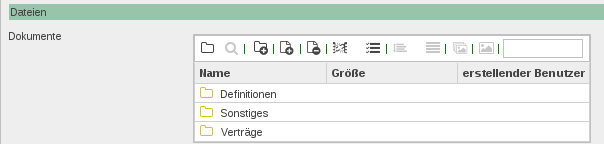
| 1. Mini File Manager | Uploading and administration of files stored in LIMBAS |
|---|---|
| 2. New Folder | Create a new Folder. Enter Folder name and click create |
| 3. New File | Select with a double click the folder you want to save the new file in. Click the New File Icon, browse your directory , select the file and click the “Add Button“ |
| 4. Delete File | Select File, click Delete icon |
| 5. Remove Link | 5 Remove Link removes the link, but the ‚unlinked‘ data record will not be deleted |
| 6. Select Displayed Fields | |
| 7. Show all files | Shows all linked files independent from their folder location |
| 8. Simple View | Shows folders / files without any details, e. g. date or file size |
| 9. Picture Show | Thumbnails of images displayed. Click to enlarge |
| 10. Picture Gallery | Picture is displayed; use the arrows to scroll forward or backward |
| 11. Search Files | Search for files that can be linked |